How to Stop Windows 7 from Automatically Installing Drivers and Manually Install them Yourself
This is a little guide I had written a few years ago and never had a chance to publish, until now.
Note: This method only applies to Windows 7 Professional, Windows 7 Ultimate, and Windows 7 Enterprise. Other editions of windows 7, such as Windows 7 Home, do not come with Group Policy installed.
Purpose
Windows 7 is known to automatically find the “best” drivers and install them for you.
However, in some instances, it installs the wrong drivers which will cause hardware and software to function improperly.
This guide will describe how to stop Windows 7 from automatically installing hardware drivers, so that you can manually install the drivers yourself.

Table of Contents
Preparation / Before You Begin
Step 1. – Disabling Automatic Driver Instillation
Step 2. – Uninstall the Current Driver and Install the New Driver
Step 3. – Re-enable Automatic Driver Installation
Preparation / Before You Begin
Make sure you already have the driver downloaded and extracted from its installer.
To extract the driver from its installer you can run the installer a single time, but not complete the installation, and find the location of the extracted files. The extracted files are usually inside of a new folder located on the C: drive.
OR

To manually achieve this, you can download 7zip from http://www.7-zip.org/, and open the installer using 7zip to extract the contained files.
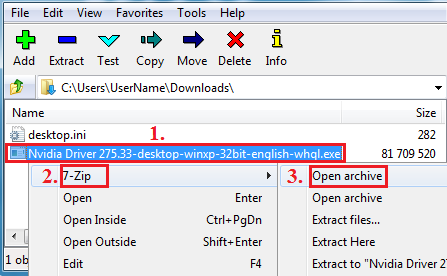
With 7zip open, navigate to the folder containing the downloaded driver.
1. Right Click on the driver installer.
2. Navigate to the “7-Zip” menu.
3. Click on “Open archive”.
Create a new folder at the location of your choice. For this guide I will refer to this folder as “New Folder”.
Note: Write down or remember where this folder is located.
Then Copy and Paste (extract) the contained files to the “New Folder”.

Step 1. – Disabling Automatic Driver Instillation
We will now stop Windows from automatically choosing and installing a driver, when you plugin your device.
1.) (1) Click the Start Menu and type gpedit.msc in the search box.
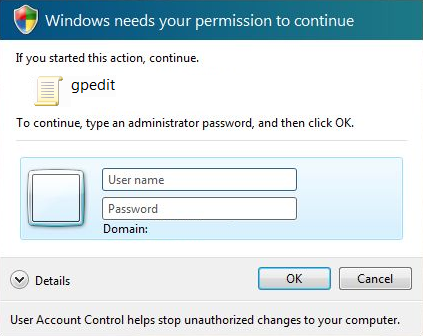
Then (2) right click on gpedit.msc and (3) select Run as administrator.

2.) You will then be prompted for your administrator Username and Password.
3.)
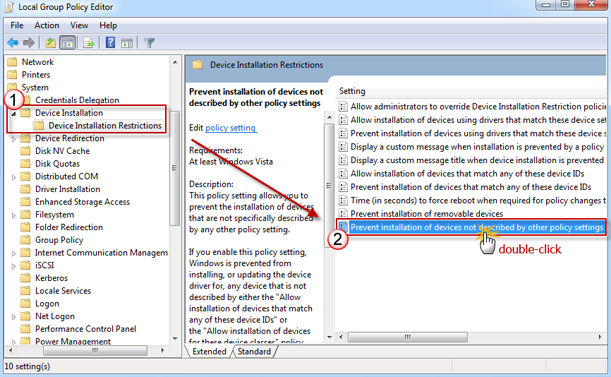
A.) Once gpedit is open, go to the folder icons, on the left hand side, and expand the Computer Configuration folder. (To expand a folder, click on the sideways triangle to the left of the folder.)
B.) Then expand the Administrative Templates folder.
C.) Expand the System folder.
D.) Expand the Device Installation folder.
E.) Expand the Device Installation Restrictions folder.
F.) Under the Setting, on the right hand side, double click on “Prevent installation of devices
not described by other policy settings”.
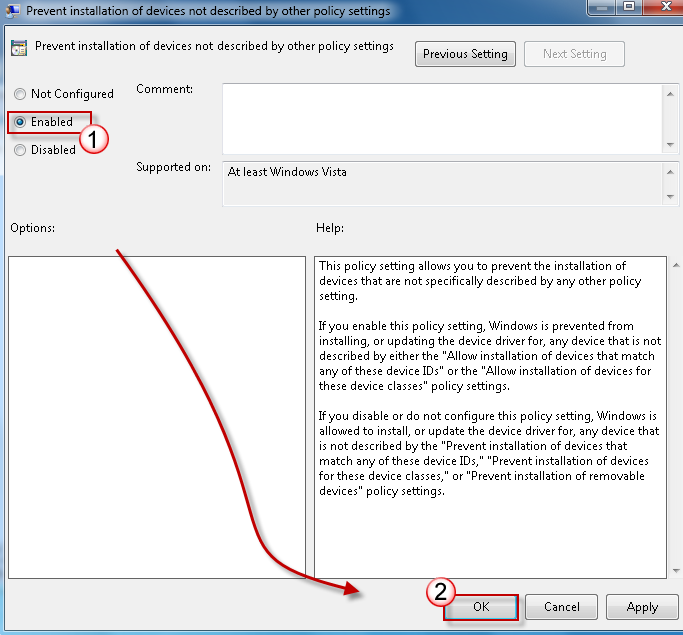
4.) Select “Enabled”, and then click OK.
4.) Under the Setting tab, on the right hand side, double click on “Allow administrators to override Device Installation Restriction policies”.
5.) Select “Enabled”, and then click OK.
6.) Exit gpedit.msc and restart the computer.
Step 2. – Uninstall the Current Driver and Install the New Driver
1.) Once the computer is finished restarting, the device manager will need to be run to manually uninstall the old driver and install the new driver.
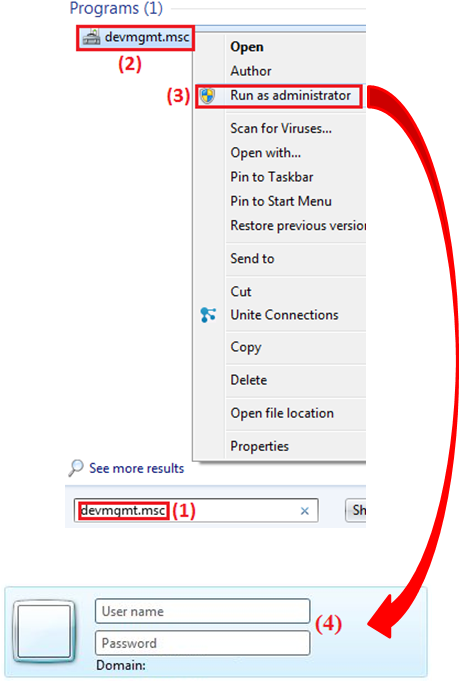
(1) Go to the start menu and type in “devmgmt.msc”.
(2) Right click the “devmgmt.msc” program.
(3) Select “Run as administrator”.
(4) Enter your administrator Username and Password, when you are prompt for it.
2.) Once the Device Manager is open, navigate to the device that has the wrong driver installed.
(For this guide I will be using the videocard driver as an example.)
(1) Right click on the device. (In this instance it is the “Intel(R) HD Graphics”, graphics card
device.)
(2) Select “Properties”.

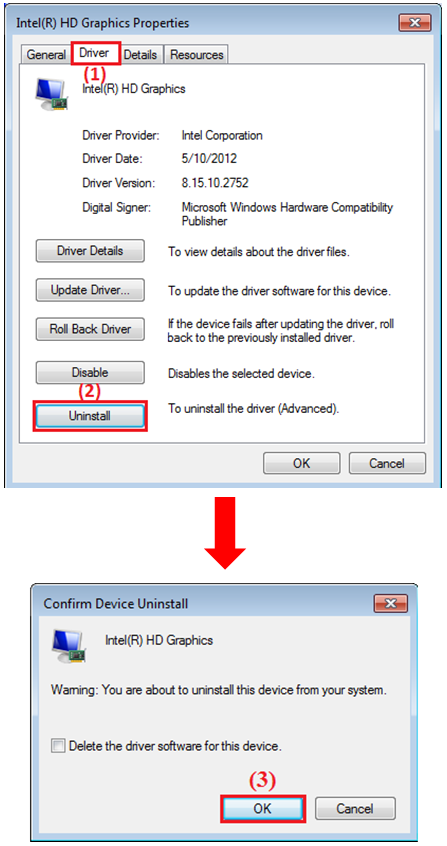
3.) Once in the properties window is open…
(1) Select the “Driver” tab.
(2) Click the “Uninstall” button.
(3) Click the “Ok” button.
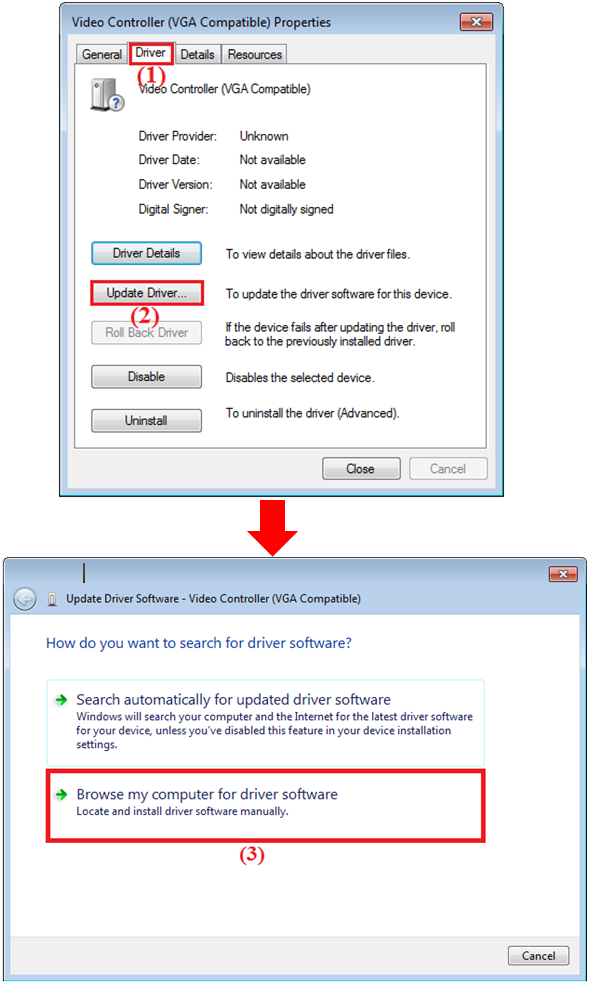
4.) When you are back in the properties window.
(1) Navigate to the “Driver” tab.
(2) Click the “Update Driver” button.
(3) A new window should pop up. Please Click the “Browse my computer for driver
software” button.
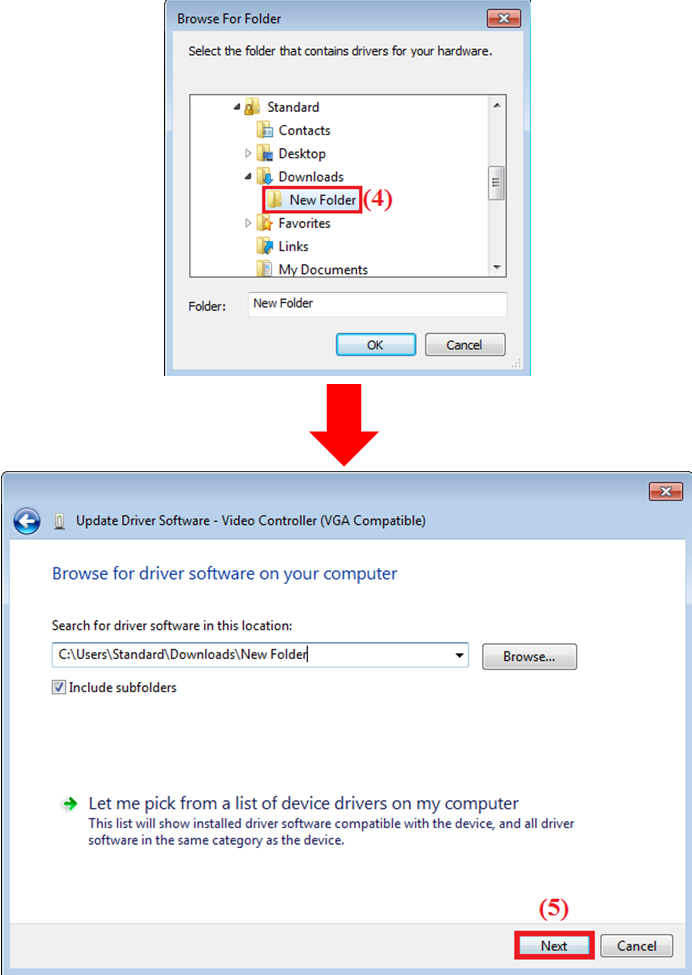
(4) Navigate to and select the “New Folder” you created in the “Preparation / Before You
Begin” section or the location of the extracted driver files.
(5) Click the “Next” button and follow any installation prompts. You may be asked to restart
your computer please go ahead and do so.
Step 3. – Re-enabling Automatic Driver Instillation
1.) (1) Click the Start Menu and type gpedit.msc in the search box.
Then (2) right click on gpedit.msc and (3) select Run as administrator.
2.) You will then be prompted for your administrator Username and Password.
3.)
A.) Once gpedit is open, go to the folder icons, on the left hand side, and expand the computer Configuration folder. (To expand a folder, click on the sideways triangle to the left of the folder.)
B.) Then expand the Administrative Templates folder.
C.) Expand the System folder.
D.) Expand the Device Installation folder.
E.) Expand the Device Installation Restrictions folder.
F.) Under the Setting, on the right hand side, double click on “Prevent installation of devices
not described by other policy settings”.
4.) Select “Not Configured”, and then click OK.
5.) Exit gpedit.msc and restart the computer.