Configuring “External Sender” Warning Messages for Office 365 emails
How to configure warning messages for Office 365 emails from external senders, when the name of an external sender matches the name of an internal employee.
As a security precaution, you can implement a mail flow rule in the Exchange admin center, so that external attacks who try and spoof emails, so they look like they are coming from within your organization, create a warning banner at the top of emails, notifying the user to be careful.
1.) Log in to your Office 365 Admin account at: https://portal.office.com
2.) In the top-left App Launcher (waffle icon), select “Admin”.
3.) In the left-hand navigation pane, go to:
Admin centers → Exchange
(This will open the Exchange admin center in a new tab.)
4.) In the Exchange admin center, select “Mail flow” from the left-hand menu.
5.) Click the + (plus) button and select “Create a new rule”.
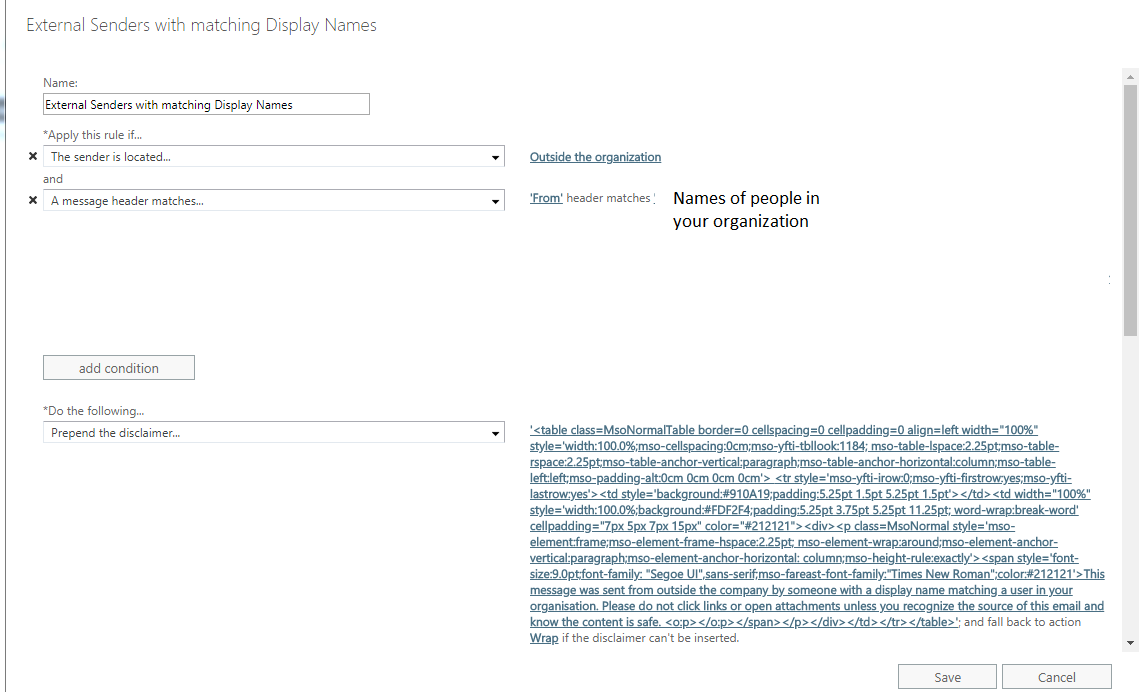
6.) Name the rule:
Example: External Senders with matching Display Names
7.) Under “Apply this rule if”
A.) Select “The sender is located”
B.) Then select, “Add condition”
C.) Select “A message header matches”
D.) Header: “From”
E.) Match value: Enter names of internal staff (i.e., known display names that could be impersonated)
8.) At the bottom of the rule window, click “More options”, to show advanced settings.
9.) Select Add condition:
A.) Choose “The recipient is”
B.) Then select “Inside the organization”
10.) Under “Do the following”
A.) Select “Apply a disclaimer to the message”
B.) Then choose “prepend a disclaimer”
11.) Then select “Enter text”
Enter the message you would like displayed.
Format it using HTML.
<div style="border: 1px solid red; padding: 10px; background-color: #fff3cd;">

<strong>Warning:</strong> This email originated from outside your organization.

<strong>Do not click links or open attachments unless you recognize the sender.

</div>
Tip: Keep it short to avoid hiding email content previews