Controlled Folder Access
Windows Controlled Folder Access: How It Works, What It Does, and How to Turn It On or Off
Controlled Folder Access (CFA) is a Windows security feature in Microsoft Defender designed to help stop ransomware and other untrusted apps from changing files in important folders. If you support Windows endpoints (or you are building a lab for testing policies like you have been doing for your technotes.me writeups), CFA is worth understanding because it is one of those settings that can dramatically improve protection, but it can also break legitimate workflows if you deploy it without planning.
This article explains what Controlled Folder Access does, how it works under the hood, where it fits alongside NTFS permissions, and the practical ways to enable, audit, troubleshoot, or disable it on Windows 10 and Windows 11.
What Is Controlled Folder Access?
Controlled Folder Access is part of Microsoft Defender’s ransomware protection. It protects specific folders by controlling which applications are allowed to write to them. When an application tries to create, modify, or delete a file inside a protected folder, Defender evaluates the process. If the app is not trusted (or not explicitly allowed), the write is blocked and logged.
Think of it as an application-based “write gate” for your most important folders. NTFS permissions answer “Which user can access this file?” CFA adds “Is this application allowed to modify files here?”
What CFA Is Trying to Stop
- Ransomware encrypting user data in Documents, Desktop, Pictures, and similar locations
- Unknown or suspicious executables silently overwriting critical files
- Malicious scripts or droppers using user context to destroy or corrupt data
How Controlled Folder Access Works
At a high level, CFA has three moving parts:
- Protected folders: A list of folders that are guarded by CFA.
- Allowed apps: A list of apps that are explicitly permitted to write to protected folders.
- Trust evaluation: Microsoft Defender’s logic for determining whether a process is trusted.
What Happens When an App Writes to a Protected Folder
- A process attempts to write to a file in a protected folder (create, modify, delete, rename, etc.).
- Microsoft Defender checks whether the process is trusted or on the allow list.
- If allowed, the file operation proceeds.
- If not allowed, the operation is blocked and Windows logs an event (and often shows a notification).
CFA vs NTFS Permissions (Why Both Can Matter)
NTFS permissions and Controlled Folder Access solve different problems:
- NTFS permissions: Prevent the wrong user or group from accessing a file/folder.
- CFA: Prevent the wrong application from modifying files, even if the user has access.
In real IT support, this difference matters because ransomware typically runs as the logged-in user. NTFS permissions often will not stop it. CFA can.
Default Protected Folders (And What You Can Add)
When enabled, CFA protects common user data locations like:
- Documents
- Pictures
- Videos
- Music
- Desktop
- Favorites
You can also add custom paths, which is especially useful for:
- Line-of-business app data folders
- Engineering or design working directories
- Shared local project folders
- Local sync folders (be careful here, see notes below)
Modes: Disabled, Enabled, and Audit
CFA typically supports three operating modes:
- Disabled: No blocking, no CFA enforcement.
- Enabled: Blocks unauthorized write attempts to protected folders.
- Audit mode: Does not block, but logs what would have been blocked.
Best practice for enterprise: Start with Audit mode, review logs, then move to Enabled once you have allowed the legitimate apps that need access. This maps nicely to how you approach policy rollouts in a lab before production (similar mindset to Group Policy and Intune testing).
How to Turn Controlled Folder Access On or Off (Windows 10 and Windows 11)
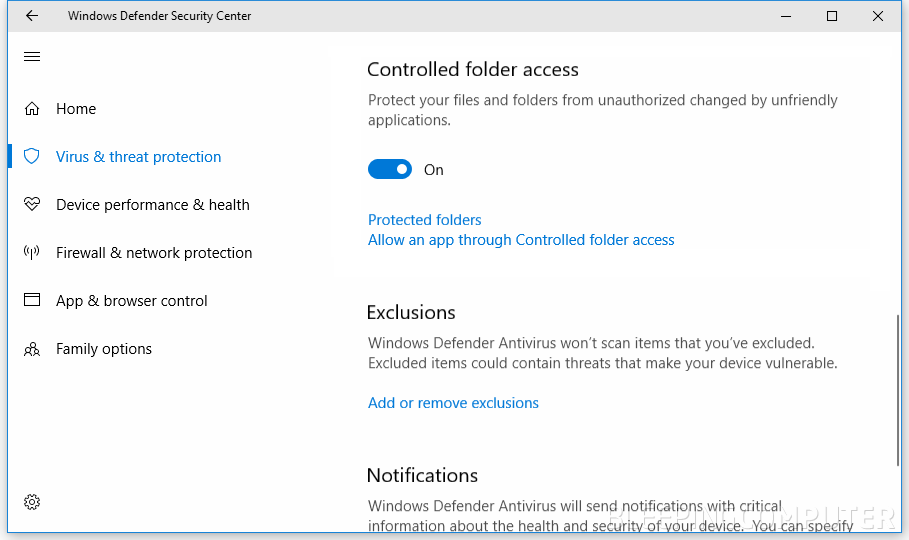
Option 1: Windows Security (GUI)
- Open Windows Security.
- Select Virus & threat protection.
- Scroll to Ransomware protection and click Manage ransomware protection.
- Toggle Controlled folder access:
- On to enable
- Off to disable
From the same page you can also manage:
- Protected folders
- Allow an app through Controlled folder access
Option 2: PowerShell (Fast, Scriptable)
This is a great approach for repeatable lab steps and for blog documentation since it is copy-paste friendly.
Check CFA Status
Get-MpPreference | Select-Object ControlledFolderAccessEnabledCommon values you may see:
- 0 = Disabled
- 1 = Enabled
- 2 = Audit mode
Enable CFA (Block Mode)
Set-MpPreference -EnableControlledFolderAccess 1Disable CFA
Set-MpPreference -EnableControlledFolderAccess 0Set Audit Mode
Set-MpPreference -EnableControlledFolderAccess 2Option 3: Local Group Policy (Common in Business Environments)
If you are testing this in a Windows domain lab (like your AD DNS and logon flow work), Group Policy is a common deployment method.
- Open Local Group Policy Editor:
gpedit.msc - Navigate to:
Computer Configuration
  > Administrative Templates
    > Windows Components
      > Microsoft Defender Antivirus
        > Microsoft Defender Exploit Guard
> Controlled Folder Access- Open Configure Controlled folder access.
- Set it to Enabled and choose the desired mode (Enable, Audit, or Disable depending on the policy options presented).
- Apply the policy and update policy on the client:
gpupdate /forceOption 4: Registry (Advanced, Use Carefully)
Some administrators use registry-based configuration for specific deployment scenarios. Be careful: registry changes are easy to automate, but also easy to misconfigure.
Common path referenced for CFA configuration:
HKEY_LOCAL_MACHINE\SOFTWARE\Microsoft\Windows Defender\Windows Defender Exploit Guard\Controlled Folder AccessLook for a value similar to:
EnableControlledFolderAccess(DWORD)
Typical meanings:
- 0 = Disabled
- 1 = Enabled
- 2 = Audit mode
How to Allow Legitimate Apps (When CFA Blocks Them)
The most common “CFA problem” is that it blocks legitimate applications that need to write into protected folders, such as:
- Legacy accounting apps saving reports to Documents
- Custom line-of-business apps writing templates to Desktop
- Developer tools generating output under user profile folders
- Some backup, sync, or automation utilities
Allow an App via Windows Security
- Open Windows Security.
- Go to Virus & threat protection.
- Under Ransomware protection, select Manage ransomware protection.
- Choose Allow an app through Controlled folder access.
- Add the executable for the application.
Allow an App via PowerShell
Example:
Add-MpPreference -ControlledFolderAccessAllowedApplications "C:\Path\To\App.exe"Tip: In enterprise environments, ensure you are allowing the correct executable path (and not a user-writable path that malware could abuse). Favor signed binaries and stable install locations like C:\Program Files\.
How to Add Custom Protected Folders
Add Protected Folder via GUI
- Windows Security
- Virus & threat protection
- Manage ransomware protection
- Protected folders
- Add a protected folder
Add Protected Folder via PowerShell
Add-MpPreference -ControlledFolderAccessProtectedFolders "D:\CriticalData"Practical note: If you protect a folder that is heavily used by business apps, test in Audit mode first to avoid interrupting workflows.
Troubleshooting: How to Tell What CFA Blocked
When CFA blocks something, you want to answer two questions quickly:
- What executable was blocked?
- What folder (and file path) was it trying to modify?
Check Windows Security Notifications
Often, Windows will pop a notification that an app was blocked from accessing a protected folder. This can be enough for a quick helpdesk resolution.
Use Event Viewer (Most Reliable)
- Open Event Viewer.
- Check Defender-related logs (commonly under Windows Logs and Applications and Services Logs).
- Look for events indicating controlled folder access blocks and review the process path and target folder.
If you want to make this extra “IT blog friendly,” you can include a screenshot of Event Viewer showing a CFA block event, plus a callout box explaining what fields matter (process path, target path, user, timestamp).
When Does It Make Sense to Turn CFA Off?
Disabling CFA reduces ransomware resistance, so treat “turn it off” as a troubleshooting step, not the default solution.
Valid reasons to temporarily disable CFA:
- You are diagnosing a business-critical app failure and CFA is confirmed as the cause
- You need to complete a software deployment that writes to protected locations and you have not built the allow list yet
- You are migrating systems and need a short maintenance window without write restrictions
Prefer these safer options when possible:
- Switch from Enabled to Audit mode temporarily
- Add only the required trusted executables to the allowed apps list
- Narrow or adjust protected folders rather than disabling CFA globally
Enterprise Notes: Where CFA Fits with Intune and Microsoft Defender for Endpoint
If you are managing devices with Intune or Microsoft Defender for Endpoint (MDE), CFA becomes more powerful because you can:
- Roll it out gradually (pilot group, then phased deployment)
- Start in Audit mode, review telemetry, then enforce
- Standardize protected folder lists and allowed app lists
- Investigate blocks centrally
This mirrors a clean PM-style rollout: define scope, pilot, capture issues, remediate, then deploy broadly. It also lines up with how you have been structuring your step-by-step policy and PowerShell articles.
Best Practices Summary
- Use Audit mode first in business environments.
- Review logs to identify legitimate apps that will be blocked.
- Allow only trusted executables from stable install paths.
- Add protected folders thoughtfully, starting with high-value data locations.
- Document what you changed (great for internal SOPs and for technotes.me articles).
Copy and Pasteable Commands Referenced Above
# Check Controlled Folder Access status
Get-MpPreference | Select-Object ControlledFolderAccessEnabled

# Enable Controlled Folder Access (block mode)
Set-MpPreference -EnableControlledFolderAccess 1

# Disable Controlled Folder Access
Set-MpPreference -EnableControlledFolderAccess 0

# Enable Audit mode (log only)
Set-MpPreference -EnableControlledFolderAccess 2

# Allow a specific app (example path)
Add-MpPreference -ControlledFolderAccessAllowedApplications "C:\Program Files\ExampleApp\Example.exe"

# Add a custom protected folder
Add-MpPreference -ControlledFolderAccessProtectedFolders "D:\CriticalData"