
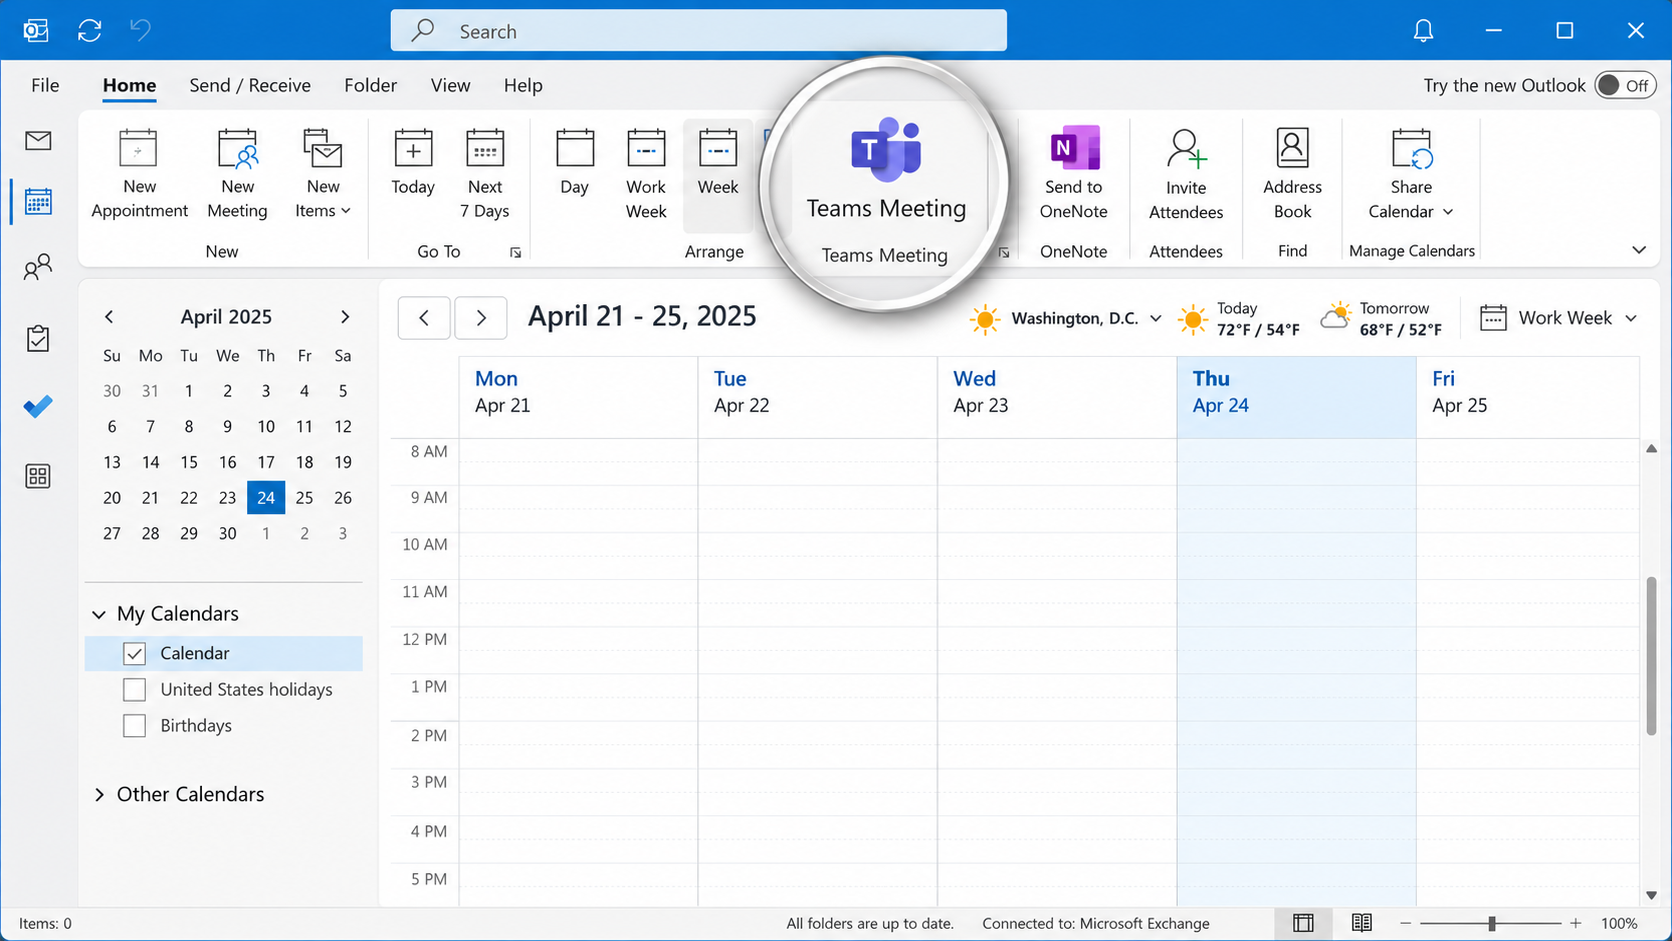
The Microsoft Teams Meeting add-in allows users to schedule and manage Teams meetings directly from Microsoft Outlook. However, the integration can occasionally stop working, causing the Teams Meeting button to disappear, become disabled, or fail to generate meeting invitations. These issues can occur following Microsoft Office updates, Teams upgrades, software installations, changes to Windows registry settings, or organizational policy updates.
Troubleshooting the Teams Meeting add-in requires more than simply reinstalling Microsoft Teams. The underlying problem may involve COM add-in registration, incorrect 32-bit or 64-bit components, Windows security restrictions, Outlook’s add-in resiliency features, or Microsoft 365 account and meeting policies.
This guide provides a detailed, troubleshooting process for identifying and resolving these issues.
It includes step-by-step procedures, Windows Registry modifications, Command Prompt and PowerShell commands, and administrative checks for Microsoft 365 environments.
The procedures primarily apply to classic Outlook for Windows, with a separate section for new Outlook, which handles Teams integration differently.
Understanding How the Teams Meeting Integration Works
Classic Outlook uses a COM (Component Object Model) add-in named:
Microsoft Teams Meeting Add-in for Microsoft Office
The add-in registers components with Windows that allow Outlook to communicate with Microsoft Teams and create online meeting invitations.
Several components must work together:
- Microsoft Outlook: Loads the Teams COM add-in and displays the meeting scheduling controls.
- Microsoft Teams desktop application: Provides the Teams account context and integration components.
- Teams Meeting Add-in: Supplies the COM integration used by classic Outlook.
- Windows Registry: Stores COM registration information, loading behavior, and related configuration.
- Microsoft 365 and Exchange: Supply the mailbox, authentication, and meeting scheduling services.
- Microsoft Teams meeting policies: Determine whether the user is permitted to schedule Teams meetings through Outlook.
A failure in any of these components can cause meeting scheduling functionality to disappear or stop working.
Important: Classic Outlook vs. New Outlook
Before troubleshooting, identify which Outlook application is installed.
| Feature | Classic Outlook | New Outlook |
|---|---|---|
| Teams integration | COM add-in | Built-in meeting functionality |
| COM add-in registration | Required | Not applicable |
| regsvr32 repairs | Applicable | Not applicable |
| 32-bit and 64-bit add-in compatibility | Important | Not applicable to Teams meeting integration |
| Meeting controls | Teams Meeting ribbon command | Teams meeting toggle in calendar events |
Important: Do not attempt to repair the COM add-in in new Outlook.
Microsoft confirmed that new Outlook does not use this component.
Reference Index
| Symptom | Likely Area to Investigate | Recommended Solution |
|---|---|---|
| Teams Meeting button missing | Disabled or missing add-in | Sections 4, 5 and 6 |
| Add-in appears inactive | LoadBehavior, Outlook resiliency | Sections 8 and 9 |
| Add-in installed but not in COM list | Missing or damaged registration | Section 7 |
| DLL registration fails | Incorrect architecture, DLL path, or permissions | Sections 1 and 7 |
| Add-in repeatedly becomes disabled | Outlook performance monitoring | Sections 4 and 9 |
| Only certain users are affected | Account, policy, or user-profile differences | Sections 10, 13 and 14 |
| Issue began after Teams upgrade | Add-in installation failure | Section 6 |
| Issue affects nonpersistent desktops | Deployment or MSI restrictions | Section 16 |
| Teams meeting has no joining details | Account or delegated-calendar configuration | Sections 14 and 17 |
| Teams toggle missing in new Outlook | Native Outlook integration or account problem | Section 18 |
1. Identify the Installed Outlook Version and Architecture
One of the most important steps is determining whether Outlook is running as a 32-bit or 64-bit application.
This matters because 32-bit Outlook requires the 32-bit Teams COM add-in loader, while 64-bit Outlook requires the 64-bit loader.
A computer running 64-bit Windows can still have 32-bit Microsoft Office installed.
Step 1: Determine Outlook’s Architecture
- Open classic Outlook.
- Select File > Office Account.
- Select About Outlook.
- Locate the version information at the top of the window.
- Identify whether it says 32-bit or 64-bit.
For example:
Microsoft Outlook for Microsoft 365 MSO (Version 2608 Build XXXXX) 32-bitIn this example, we must use the 32-bit Teams add-in components, even though Windows may be 64-bit.
Step 2: Understand the Different Registration Commands
| Component | 32-bit Outlook | 64-bit Outlook |
|---|---|---|
| Add-in loader directory | x86 |
x64 |
| Registration executable on 64-bit Windows | C:\Windows\SysWOW64\regsvr32.exe |
C:\Windows\System32\regsvr32.exe |
| Loader DLL | Microsoft.Teams.AddinLoader.dll |
Microsoft.Teams.AddinLoader.dll |
Windows uses somewhat confusing naming conventions:
System32contains the native 64-bit system components on 64-bit Windows.SysWOW64contains the 32-bit compatibility components.
Using the incorrect registration executable or DLL architecture can produce errors such as a DLL failing to load or a missing entry point.
Note: The Teams desktop application’s architecture does not determine which Outlook COM loader to register. Match the loader to Outlook’s architecture.
2. Confirm the Problem and Check the Basic Requirements
Before making configuration changes, establish exactly what is failing.
The most common symptoms include:
- The Teams Meeting button is missing from the Outlook ribbon.
- The Teams add-in is listed but remains disabled.
- The add-in is installed but does not appear under COM Add-ins.
- Outlook reports that the add-in could not be loaded.
- The Teams Meeting button appears, but clicking it produces an error.
- Teams meeting invitations are created without joining information.
- The problem began immediately after upgrading Microsoft Teams.
Step 1: Confirm That Teams Is Installed and Signed In
- Launch the Microsoft Teams desktop application.
- Confirm that the user is signed in with the correct work or school account.
- Verify that Teams can create meetings normally.
- Confirm that the same account, or an appropriately configured organizational account, is being used in Outlook.
- Verify that Outlook has a supported Exchange mailbox.
The classic Teams Meeting add-in is not supported for scheduling through POP/IMAP mailboxes or personal consumer accounts in the same way as Microsoft 365 work or school Exchange accounts. The Teams web application alone is not sufficient for installing the classic Windows add-in.
Step 2: Verify Where the Button Is Missing
In classic Outlook:
- Switch to Calendar.
- Select New Meeting. (Not New Appointment.)
- Inspect the meeting ribbon for the Teams Meeting command.
- If the add-in appears active but the ribbon command is missing, check whether the ribbon was customized or the command was removed.
To check the ribbon:
- Go to File > Options > Customize Ribbon.
- Select the relevant meeting context, where available.
- Review the available commands and ribbon groups.
- Restore ribbon customizations only if necessary, since resetting them can discard user-specific layouts.
Note: This distinction is important: a missing ribbon command does not always mean that the underlying COM component has failed to register.
3. Perform a Complete Restart of Teams and Outlook
This should be the first repair attempt because it does not modify the registry or reinstall any software.
Procedure
- Close Microsoft Outlook.
- Right-click the Teams icon in the Windows notification area.
- Select Quit.
- Open Task Manager and confirm that the main Teams and Outlook processes have exited.
- Start Microsoft Teams.
- Sign in if necessary.
- Start Outlook.
- Create a new calendar meeting and check for the Teams Meeting button.
If the issue persists, sign out of Teams, sign back in, and repeat the test.
Microsoft recommends starting Teams before Outlook to restore integration when the add-in fails to initialize properly.
4. Check Whether Outlook Disabled the Teams Add-in
Outlook includes an add-in resiliency system designed to protect application startup and stability.
If an add-in causes crashes, starts slowly, or delays Outlook shutdown, Outlook may disable it.
Solution A: Enable the Add-in Through COM Add-ins
- Open classic Outlook.
- Select File > Options > Add-ins.
- Check the Active Application Add-ins and Inactive Application Add-ins lists.
- At the bottom, set Manage to COM Add-ins.
- Select Go.
- Locate Microsoft Teams Meeting Add-in for Microsoft Office.
- Select its checkbox if it is unchecked.
- Select OK.
- Restart Outlook.
If the add-in does not appear in the COM Add-ins list at all, skip to the reinstall and registration procedures.
Solution B: Restore the Add-in from Disabled Items
The Disabled Items list is separate from the COM Add-ins list.
- Open File > Options > Add-ins.
- Change Manage to Disabled Items.
- Select Go.
- Locate the Teams Meeting add-in.
- Select Enable.
- Close and restart Outlook.
Solution C: Prevent Outlook from Disabling the Add-in Again
If Outlook repeatedly disables the Teams add-in, Microsoft documents a workaround:
- Open classic Outlook.
- Navigate to File > Manage COM Add-ins, if the command is available.
- Find the Teams Meeting add-in.
- Expand its Options.
- Select Do not monitor this add-in for the next 30 days, if available.
- Alternatively, select Always enable this add-in.
- Apply the change and restart Outlook.
Caution: This bypasses certain resiliency checks. It should be used after investigating whether the add-in is genuinely causing performance or stability problems.
5. Run Microsoft’s Automated Outlook Add-in Troubleshooter
Microsoft provides an automated troubleshooter specifically for the Teams Meeting add-in in classic Outlook.
Procedure
- Open Microsoft’s Teams Meeting Add-in Troubleshooter.
- Locate the automated troubleshooting section.
- Select Start.
- Allow the website to open Windows Get Help, if prompted.
- Follow the troubleshooting steps.
- Restart Teams and Outlook.
- Test the add-in.
Note: The troubleshooter requires Windows 10 or later and must be run on the affected computer. It does not repair the Teams integration in new Outlook.
6. Reinstall the Teams Meeting Add-in Without Reinstalling Microsoft Office
One common cause is a Teams upgrade that leaves behind an outdated or incorrectly installed Meeting Add-in.
Microsoft has specifically documented this failure during migration from classic Teams to new Teams.
Solution A: Force New Teams to Reinstall the Add-in
- Close Outlook completely.
- Quit Microsoft Teams from the Windows notification area.
- Open Settings > Apps > Installed apps.
- Search for
Microsoft Teams Meeting Add-in for Microsoft Office. - If present, uninstall that entry. Do not uninstall Outlook.
- Launch new Microsoft Teams.
- Sign in and allow Teams to initialize.
- Return to Installed apps and check whether the Teams Meeting Add-in has reappeared.
- Once installed, launch Outlook and test the meeting functionality.
Microsoft documents this as a resolution for cases where upgrading to new Teams fails to properly install the add-in.
Solution B: Use Microsoft’s Official Add-in Removal Scripts
If a normal uninstall fails, Microsoft provides specific cleanup scripts for the Teams Meeting Add-in.
The process depends on the installed version.
The scripts are available in Microoft’s official repair documentation.
| Installed Add-in Version | Microsoft Cleanup Method |
|---|---|
No add-in listed, or version begins with 1.23 |
UninstallOldTMA.ps1 |
Version does not begin with 1.23 |
UninstallTMA.ps1 |
| When to Use | Download Script | PowerShell Requirements |
|---|---|---|
| Add-in not found, or version starts with 1.23 | UninstallOldTMA.ps1 | Run as Administrator |
| Add-in version does not start with 1.23 | UninstallTMA.ps1 | Run as standard user |
Procedure
- Close Teams and Outlook.
- Identify the installed add-in version from Windows Installed apps.
- Download the appropriate script directly from Microsoft’s documentation.
- Review the script before execution.
- Run
UninstallOldTMA.ps1in an elevated PowerShell session when its documented conditions apply. - For
UninstallTMA.ps1, follow Microsoft’s instructions for an ordinary PowerShell session. - Launch new Teams.
- Confirm that the add-in has reinstalled.
- Restart Outlook.
Note: Do not blindly use both cleanup scripts. Only run the one that is required.
7. Manually Re-register the Teams Meeting Add-in DLL
If the Teams add-in files are present but Outlook does not load the add-in, the COM registration may be damaged or missing.
The Teams add-in loader is named:
Microsoft.Teams.AddinLoader.dllMicrosoft documents manual re-registration using regsvr32.exe, with different commands for 32-bit and 64-bit Office.
Step 1: Locate the Add-in DLL
Open File Explorer and check:
%LocalAppData%\Microsoft\TeamsMeetingAddinYou may also encounter the per-user installation directory:
%LocalAppData%\Microsoft\TeamsMeetingAdd-inThe exact folder name and location can depend on the add-in installation or deployment method.
Within the installation directory, look for a version-numbered folder containing x86 and x64 subdirectories.
For example:
C:\Users\jdoe\AppData\Local\Microsoft\TeamsMeetingAddin\
    1.0.23334.11\
        x86\
            Microsoft.Teams.AddinLoader.dll
        x64\
            Microsoft.Teams.AddinLoader.dll
The version above is illustrative. Use the actual installed version.
You can also search for the loader using PowerShell:
$roots = @(
    "$env:LOCALAPPDATA\Microsoft\TeamsMeetingAddin",
    "$env:LOCALAPPDATA\Microsoft\TeamsMeetingAdd-in"
)

foreach ($root in $roots) {
    if (Test-Path $root) {
        Get-ChildItem -Path $root `
            -Filter "Microsoft.Teams.AddinLoader.dll" `
            -Recurse -File |
        Select-Object -ExpandProperty FullName
    }
}
If both loader directories are missing, return to the add-in installation procedure instead of attempting DLL registration.
Step 2: Close Outlook and Teams
Confirm that neither application is running.
Step 3A: Register the DLL for 64-bit Outlook
Open an appropriately authorized Command Prompt in the affected user’s registration context.
Replace the example DLL path with the actual full path:
"%SystemRoot%\System32\regsvr32.exe" /n /i:user "C:\Users\jdoe\AppData\Local\Microsoft\TeamsMeetingAddin\1.0.23334.11\x64\Microsoft.Teams.AddinLoader.dll"This uses the 64-bit version of regsvr32.exe and the x64 add-in loader.
Step 3B: Register the DLL for 32-bit Outlook
For 32-bit Outlook installed on 64-bit Windows, use:
"%SystemRoot%\SysWOW64\regsvr32.exe" /n /i:user "C:\Users\jdoe\AppData\Local\Microsoft\TeamsMeetingAddin\1.0.23334.11\x86\Microsoft.Teams.AddinLoader.dll"This uses the 32-bit registration executable and the x86 loader.
The /n /i:user switches are part of Microsoft’s documented registration procedure. Do not remove them.
Note: The /i:user operation affects per-user registration. If elevation is supplied using a different administrator account, the operation may register components under the wrong user context. Verify the security identity of the process and use the affected user’s intended registration context.
Step 4: Restart and Verify
- Start Microsoft Teams.
- Sign out and back in if necessary.
- Launch Outlook normally, without Run as administrator.
- Navigate to Calendar.
- Create a new meeting.
- Test the Teams Meeting command.
If regsvr32 produces an error, preserve the exact error message. Do not assume that repeating the command will fix a missing dependency, permission error, or architecture mismatch.
8. Verify the Teams Add-in Registry Entries
A Teams add-in can be physically installed on disk while Outlook lacks the registry information needed to load it.
Warning!: Before modifying the registry, create a backup of the affected keys and confirm whether the computer is managed through Group Policy or Microsoft Intune to prevent conflicts.
Step 1: Check the Per-user COM Add-in Entry
Open Registry Editor:
regedit.exeNavigate to:
HKEY_CURRENT_USER\SOFTWARE\Microsoft\Office\Outlook\Addins\TeamsAddin.FastConnectLocate:
LoadBehaviorFor a normally enabled Teams add-in, Microsoft recommends:
| Registry Value | Expected Setting |
|---|---|
| Name | LoadBehavior |
| Type | REG_DWORD |
| Data | 3 |
A value of 3 indicates that Outlook should load the add-in during startup.
Step 2: Inspect the Setting Using Command Prompt
reg query "HKCU\SOFTWARE\Microsoft\Office\Outlook\Addins\TeamsAddin.FastConnect" /v LoadBehaviorExpected output resembles:
LoadBehavior REG_DWORD 0x3If the existing registration is otherwise valid but the value is incorrect, update it using:
reg add "HKCU\SOFTWARE\Microsoft\Office\Outlook\Addins\TeamsAddin.FastConnect" /v LoadBehavior /t REG_DWORD /d 3 /fRun this command in the affected user’s context.
Step 3: Check Machine-level Registration for 32-bit and 64-bit Outlook
Depending on how the add-in was deployed, Outlook may also load an add-in registered at the machine level.
For 64-bit Outlook on 64-bit Windows:
HKEY_LOCAL_MACHINE\SOFTWARE\Microsoft\Office\Outlook\AddinsFor 32-bit Outlook on 64-bit Windows:
HKEY_LOCAL_MACHINE\SOFTWARE\WOW6432Node\Microsoft\Office\Outlook\AddinsLook for TeamsAddin.FastConnect where applicable.
These locations are particularly useful when troubleshooting machine-wide add-in installations, virtual desktop images, and third-party software deployment packages.
The WOW6432Node branch is important because Windows redirects portions of the registry for 32-bit applications. A technician inspecting only the native 64-bit machine registration may overlook the registration used by 32-bit Outlook.
9. Repair Outlook Add-in Resiliency Registry Settings
If the Teams add-in repeatedly becomes disabled after restarting Outlook, the issue may involve Outlook’s resiliency configuration.
Solution A: Inspect the DoNotDisableAddinList Registry Key
Navigate to:
HKEY_CURRENT_USER\Software\Microsoft\Office\16.0\Outlook\Resiliency\DoNotDisableAddinListIf appropriate for the diagnosed problem, create a DWORD (32-bit) value:
Name: TeamsAddin.FastConnect
Type: REG_DWORD
Value: 1
Alternatively, run:
reg add "HKCU\Software\Microsoft\Office\16.0\Outlook\Resiliency\DoNotDisableAddinList" /v TeamsAddin.FastConnect /t REG_DWORD /d 1 /fRestart Outlook.
Microsoft documents this as a workaround for the Teams Meeting add-in being automatically disabled.
The 16.0 Office registry version applies to several modern Office releases, including Microsoft 365 Apps and Office 2016 or later perpetual versions.
Warning: This setting is not a replacement for fixing a crashing add-in.
Preventing Outlook from disabling an unstable component can contribute to recurring application problems.
Solution B: Review Outlook’s Disabled Add-ins Policy
Enterprise environments can use the List of Managed Add-ins policy.
This policy can force an add-in to remain enabled, disabled, or user-configurable.
| Policy Value | Behavior |
|---|---|
0 |
Always disabled |
1 |
Always enabled |
2 |
User configurable |
For a Teams add-in, the ProgID is:
TeamsAddin.FastConnectIf policy explicitly blocks the add-in, changing the user’s ordinary LoadBehavior registry value may have no lasting effect.
Check the effective settings using Group Policy, Intune, or Microsoft 365 Apps policy management.
10. Check Microsoft Office Group Policy Restrictions
This is especially important if the add-in works on some devices but not on others within the same organization.
Step 1: Generate a Group Policy Report
Open an elevated Command Prompt:
gpresult /h "%TEMP%\gp-report.html"Open the generated report and inspect applied user and computer policies.
Check for Outlook add-in restrictions, Windows Installer restrictions, and Office security settings.
For computers managed by Intune or Microsoft 365 Cloud Policy, inspect those management systems too. gpresult does not provide a complete picture of every cloud-applied policy.
Step 2: Inspect the Outlook Object Model Security Policy
Microsoft specifically identifies the following configuration as a potential cause:
HKEY_CURRENT_USER\SOFTWARE\Policies\Microsoft\Office\16.0\Outlook\SecurityFor Microsoft 365 Cloud Policy, inspect:
HKEY_CURRENT_USER\SOFTWARE\Policies\Microsoft\Cloud\Office\16.0\Outlook\SecurityLook for:
promptoomaddressinformationaccessA value of 0 means programmatic access requests to address information are automatically denied.
If configured, check the Configure trusted add-ins policy.
Depending on organizational requirements, an administrator may need to authorize the Teams add-in DLL or adjust the policy configuration.
Note: Do not disable security policies globally just to make an add-in work.
11. Verify the Required .NET Framework and WebView2 Components
The Teams Meeting add-in relies on Microsoft runtime components.
Missing or outdated dependencies can cause the add-in to load incorrectly or be disabled.
Step 1: Check .NET Framework
Open PowerShell:
Get-ItemProperty "HKLM:\SOFTWARE\Microsoft\NET Framework Setup\NDP\v4\Full" |
Select-Object Release, Version
For .NET Framework 4.8, the release value is at least 528040. Higher release values may represent newer supported versions, including .NET Framework 4.8.1.
If the required runtime is missing, install or enable the supported version using Microsoft’s official distribution channels.
Step 2: Verify Microsoft Edge WebView2 Runtime
- Open Control Panel > Programs > Programs and Features.
- Look for Microsoft Edge WebView2 Runtime.
- Verify that it is installed.
- Update or repair it through your approved software deployment process if necessary.
Microsoft specifically identifies .NET Framework 4.8 and WebView2 as requirements for avoiding a degraded Teams Meeting add-in experience.
12. Check Outlook and Teams Privilege Levels
If Outlook runs with elevated administrator privileges but Teams runs as a standard user, the integration may fail.
Procedure
- Close both applications.
- Right-click the Outlook shortcut and select Properties.
- Check the Compatibility tab where available.
- Ensure Run this program as an administrator is not enabled.
- Perform the same check for Teams.
- Start Teams normally.
- Start Outlook normally.
- Test the add-in.
Avoid routinely running Office applications elevated as a workaround. Microsoft specifically identifies mismatched privilege levels as a Teams Meeting add-in troubleshooting condition.
13. Verify Microsoft Teams Meeting Policies
If the local add-in is installed correctly but users still cannot schedule Teams meetings, the restriction may originate from the Microsoft 365 tenant.
Solution A: Check the Teams Admin Center
- Open the Microsoft Teams Admin Center.
- Navigate to Meetings > Meeting policies.
- Identify the policy assigned to the affected user.
- Locate the meeting scheduling options.
- Confirm that Outlook add-in is enabled.
- Confirm that Private meeting scheduling is enabled.
- Save changes if needed.
- Allow time for policy changes to take effect and retest.
Solution B: Inspect Meeting Policies Using PowerShell
For administrators with the appropriate permissions, connect to Microsoft Teams PowerShell.
Connect-MicrosoftTeamsCheck the global meeting policy:
Get-CsTeamsMeetingPolicy -Identity Global |
Select-Object Identity, AllowOutlookAddIn, AllowPrivateMeetingScheduling
Check a specific policy:
Get-CsTeamsMeetingPolicy -Identity "SalesMeetingPolicy" |
Select-Object Identity, AllowOutlookAddIn, AllowPrivateMeetingScheduling
Identify the effective policy assignment for a particular user:
Get-CsUserPolicyAssignment -Identity "[email protected]" -PolicyType TeamsMeetingPolicyIf no explicit meeting policy is returned, check the applicable global policy.
If the policy needs to be changed, an authorized administrator can use:
Set-CsTeamsMeetingPolicy -Identity "SalesMeetingPolicy" -AllowOutlookAddIn $true -AllowPrivateMeetingScheduling $trueReplace the example policy name with the actual policy.
Warning: Changing a shared policy affects every user assigned to that policy.
Confirm the scope before applying changes.
14. Troubleshoot Account and Authentication Problems
Sometimes the Teams Meeting button is visible, but clicking it produces a sign-in or scheduling error.
In this situation, the COM add-in may already be functioning correctly.
Step 1: Verify the Mailbox and Teams Account
Confirm that:
- The user has a supported Exchange mailbox.
- Outlook is configured with the correct account.
- Teams is signed in to the intended Microsoft 365 organization.
- The appropriate Teams and Exchange licensing is assigned.
- The account can create a meeting through Teams itself.
Step 2: Refresh Teams Authentication
- Close Outlook.
- Sign out of Teams.
- Quit Teams.
- Start Teams again.
- Complete any required multifactor authentication.
- Launch Outlook and retry.
Step 3: Check Modern Authentication and Network Restrictions
Microsoft documents Modern Authentication as a requirement for the classic Outlook Teams Meeting add-in.
Administrators should check for authentication policies, conditional access issues, and authentication proxies that interfere with communication to Teams services.
For network investigations, compare the affected computer against a working computer on another network, when authorized. This helps distinguish a local Outlook installation problem from a proxy or network authentication issue.
15. Repair Microsoft Office
If Outlook displays other add-in errors, crashes, or behaves inconsistently, the Office installation itself may require repair.
Solution A: Quick Repair
- Close all Microsoft Office applications.
- Open Settings > Apps > Installed apps.
- Locate Microsoft 365 Apps or the installed Office suite.
- Select Modify.
- Choose Quick Repair.
- Complete the repair.
- Restart Teams and Outlook.
Solution B: Online Repair
If Quick Repair fails:
- Return to the Office application repair options.
- Select Online Repair.
- Complete the repair process.
- Restart Windows.
- Open Teams, then Outlook.
- Test the integration.
Online Repair is more comprehensive and requires an internet connection. It may also require Office reactivation or organizational deployment access.
16. Advanced Troubleshooting for VDI and Enterprise Deployments
In Citrix, Windows 365, Azure Virtual Desktop, and similar managed virtual environments, the Teams Meeting add-in may require a different deployment approach.
This is particularly important for nonpersistent desktops, where installed components may not survive a session reset unless they are deployed correctly.
Step 1: Check the Teams Meeting Add-in Installer Logs
Microsoft identifies the following log location for new Teams MSI add-in installation attempts:
%LocalAppData%\Packages\MSTeams_8wekyb3d8bbwe\LocalCache\Microsoft\MSTeams\Logs\tma_addin_msi.txtReview the log for installation failures, permission errors, and Windows Installer restrictions.
Step 2: Investigate MSI Installation Error 1625
Windows Installer error 1625 indicates that installation is prohibited by system policy.
Possible causes include:
- Windows Installer policy restrictions.
- AppLocker rules.
- MSI installation blocking.
- Incorrect packaging or deployment configuration.
Use Event Viewer and organizational policy reporting to identify the enforcing rule.
Microsoft specifically documents this failure in Teams virtual desktop deployments.
Step 3: Use Machine-wide Teams Meeting Add-in Deployment When Appropriate
Microsoft’s newer Teams bootstrapper supports installing the Meeting Add-in in machine-wide mode for managed environments.
For a fresh Teams deployment with the add-in:
teamsbootstrapper.exe -p --installTMAFor systems where new Teams is already provisioned:
teamsbootstrapper.exe --installTMATo uninstall only the machine-wide Teams Meeting Add-in:
teamsbootstrapper.exe --uninstallTMAThese commands require an appropriately current Teams bootstrapper and administrative privileges. They are intended for supported managed deployment scenarios, not as a substitute for the normal per-user repair procedure.
Microsoft also documents a manual MSI installation method, but deployment teams should prefer supported packaging procedures and test installations on their standard desktop images before broad rollout.
Step 4: Check Teams Automatic Update Restrictions
In nonpersistent environments, an administrator may intentionally disable Teams automatic updates.
Microsoft documents that this can also prevent the Teams installation process from automatically installing or updating the Meeting Add-in.
Inspect:
HKEY_LOCAL_MACHINE\SOFTWARE\Microsoft\TeamsLook for:
disableAutoUpdateIf it is set to 1, ensure your deployment process handles the add-in separately.
Note: Do not simply change this setting on a managed virtual desktop. It may be intentionally controlled by the enterprise image management process.
17. Resolve Missing Meeting Join Details in Delegated Calendars
A separate issue occurs when the Teams Meeting button works but the invitation does not include a meeting URL, meeting ID, or dial-in information.
Microsoft documents a specific scenario involving delegated calendars.
If a delegate creates a Teams meeting on behalf of another user and the delegator’s mailbox is hidden from the Global Address List (GAL), the Teams Meeting add-in may be unable to retrieve the required information.
Procedure
An Exchange Online administrator can inspect the mailbox configuration:
Connect-ExchangeOnlineGet-Mailbox -Identity "[email protected]" |
Select-Object DisplayName, HiddenFromAddressListsEnabledIf the mailbox is hidden and the business permits making it visible, Microsoft documents:
Set-Mailbox -Identity "[email protected]" -HiddenFromAddressListsEnabled $falseAfter the change, verify GAL visibility and have the delegate create a new meeting.
Note: Unhiding a mailbox affects its directory visibility.
Confirm the reason it was hidden before changing the setting.
18. Troubleshoot the Missing Teams Meeting Toggle in New Outlook
New Outlook does not use the classic Teams COM add-in.
Instead, Teams meeting functionality is built into the calendar event creation interface.
Procedure
- Open new Outlook.
- Navigate to Calendar.
- Select New event.
- Check for the Teams meeting toggle.
- Verify that Teams is signed in with the same work or school account.
- Close Outlook.
- Quit Teams from the notification area.
- Relaunch new Teams and sign in.
- Relaunch Outlook.
- Test the toggle again.
Microsoft specifically recommends restarting the integration in this order.
When the meeting is sent, Teams joining information is automatically added to the invitation. A draft may not yet display the final meeting joining information.
For a missing toggle that persists, investigate the account type, mailbox configuration, licensing, Microsoft 365 service health, and organizational meeting policies before attempting any classic Outlook add-in repairs.
Troubleshooting Checklist
Use this checklist to keep troubleshooting structured and reduce unnecessary reinstalls.
- ☐ Confirmed classic Outlook or new Outlook.
- ☐ Identified 32-bit or 64-bit Outlook.
- ☐ Verified Teams desktop client and account.
- ☐ Checked the correct Outlook calendar meeting window.
- ☐ Restarted Teams before Outlook.
- ☐ Checked COM Add-ins and Disabled Items.
- ☐ Ran Microsoft’s automated troubleshooter.
- ☐ Checked Installed apps for Teams Meeting Add-in.
- ☐ Reinstalled the add-in when required.
- ☐ Verified the correct x86 or x64 loader.
- ☐ Checked LoadBehavior and add-in resiliency.
- ☐ Reviewed Office and Teams policies.
- ☐ Verified .NET Framework and WebView2.
- ☐ Checked authentication and meeting policies.
- ☐ Reviewed installation logs if necessary.
- ☐ Successfully created and sent a test Teams meeting.
The Microsoft Teams Meeting add-in can fail for several different reasons, so effective troubleshooting depends on identifying which component is responsible rather than repeatedly reinstalling Teams or Microsoft Office.
The most useful starting points are checking whether Outlook disabled the add-in, confirming that the Teams Meeting Add-in is installed, and verifying that the correct 32-bit or 64-bit COM loader is registered.
If the add-in is installed and loading correctly but meeting scheduling still fails, the investigation should move to authentication, Exchange mailbox configuration, Teams meeting policies, and organizational security restrictions.
For enterprise and MSP technicians, maintaining a repeatable troubleshooting workflow makes it easier to isolate whether the failure is specific to a user, workstation, application version, or Microsoft 365 configuration.
Microsoft Teams Troubleshooting Documentation
The following Microsoft documentation provides additional troubleshooting procedures.
- Resolve Teams Meeting Add-in Issues in Classic Outlook
- Troubleshoot the Teams Meeting Add-in in Outlook for Windows
- Teams Meeting Add-in Missing After Updating to New Teams
- Teams Meeting Add-in Authentication and Policy Requirements
- Support for Keeping Outlook Add-ins Enabled
- Teams VDI Requirements and Deployment
- Teams Meeting Integration Missing in New Outlook